WISH ME LUCK!

Showing posts with label DIY. Show all posts

Sunday, August 10, 2008

Back to School Goodies

I obviously don't have a little one in school, but I'm the aunt to two kiddoes who will be heading back before we know it! I wanted to do something special for them so I got to baking! Yikes... I must warn you, I love to organize, I love crafting and I love baking. Thing is, I'm not so great at baking. Before Rachel Ray, I though there was something was wrong with me! But as she proudly proclaims, "we can't all be bakers!"

Still, I try. :)

I saw the cutest pencil cake in an old copy of Family Fun magazine that I'd been saving.

I was knee-deep in making the cake when I realized, I only had enough butter for half of what the recipe called for. Just my luck. So, here is my version of the "mini" pencil cake.


If you'd like to see how it's supposed to look, check out the recipe here :)

(I made homemade brownies as opposed to store bought and they did not crumble.)

I also made homemade chocolate and white chocolate chip cookies and came up with these little treat baggies for the kids:


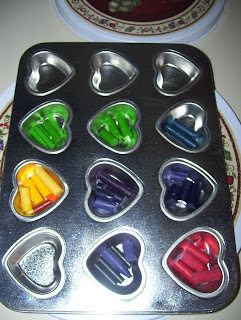
Just shape pipecleaners into letters (initials) and tie off with curly ribbon. Make another knot and slip a crayon through. Yepp, creativity as opposed to frosting a cake is definitely more my speed!

Wednesday, July 30, 2008

Toddler Time

"Homemade" Crayons!
This is super easy and gives new life to crayon bits!


Just take all your crayon bits, remove the paper, and arrange in your tins. You could get really creative with your color mixtures, but I made it pretty simple considering it was the first try. Note: I do not recommend "cheapo" crayons. It may have just been a fluke, but once they were molded, they didn't color anymore. So, stock up on the cheap Crayolas while you can!


You could use any shaped muffin tin or mold pan, I just happened to score a heart shaped one at the dollar store!

Pop in the oven at about 200 degrees.. just keep an eye on them! Once melted, set out until dried and molded. Mine popped out easily once cooled, so you shouldn't have any problems.

Perfect for little one's hands. I sprang for the Tadoodles a while back and trust me, they were not worth the money!

I will be using these for goody-bags and holidays. Very original and creative and I can't think of a kid who wouldn't love these!

Wednesday, July 16, 2008

Yummy Scents!


I will never buy a candle again! Monkey and I had oranges for a snack today and I thought I'd simmer the peel in water with a little cinnamon and it smells GREAT! Better than any candle or warmer I have ever purchased. The scent filled my entire house. I highly recommend this--it really works. Just simmer on low and add water as needed. YUM!!

Preserving Memories


I have come up with a few creative ways to preserve my daughter's artwork and I wanted to share them with you! In doing this, though, I am hoping some of you have some ideas to share, as I am losing space on my refridgerator! ;)


A few weeks ago Monkey picked me "my first flower" and luckily I got a great picture but she quickly shredded it up. So, later when she picked me another one, I held on to it for dear life! So here's what I've done:
I got a frame that matched my kitchen (Dollar Store, of course) and I "laminated" it by taping it across a plain white index card. I pressed the flower down pretty firmly to keep it from getting "icky" under the tape. I also put the date on the back.

Another thing I've done is kept a notebook for her to doodle in. I purchased a matted frame that holds 3 pictures and just cut to size a few of the doodles she made and framed it in her little classroom.


I went to our local print shop and laminated a some of her scribbles and came home and created a few gifts. Big Daddy's (Grandpa) birthday is right around the corner so I made a bookmark out of one of them and I know he will just be tickled!

So inexpensive, yet priceless!
I would love to hear some of your budget-friendly ideas!